Sunday, April 23, 2006

The People Behind My Eyes

THE PEOPLE BEHIND MY EYES

I swear you will not have to click anymore links after this one. The proper link for the above journal is listed. I apologize for the difficulties.

The People Behind My Eyes is a day to day journey to healing and an in depth discussion of life with what use to be called Multiple Personality Disorder but is now called Dissociative Identity Disorder/DID. The new journal location is updated regularly and includes artwork and poetry.

If for some reason you can't remember my links just look up how I sign my name on comments or on my journal entries. You can google the name "Austin of Sundrip Journals" and it'll pull me up every time.


Wednesday, March 08, 2006

WALNUT CHOCOLATE CHIP PIE

WALNUT CHOCOLATE CHIP PIE


This pie is an improvised treat based on the delectable Kentucky Bourbon Pie. I didn’t have pecans or bourbon, thus the improvisation. I substituted walnuts for pecans but kept the rest of the pie the same.

Ingredients

2 eggs
1 cup light corn syrup (for more colour use dark corn syrup)
3/4 cup sugar
1/2 tsp. salt (optional)
1 tsp. vanilla extract
2 Tbsps unsalted butter, melted
1 cup walnut halves
1/2 cup semisweet chocolate chips
1 9 inch frozen pie shell, thawed


Instructions

Preheat oven to temperature 375°F. Beat eggs lightly with an electric mixer in a mixing bowl. Add corn syrup, sugar, salt and vanilla. Beat until mixed thoroughly. Add melted butter and mix. Stir in pecans by hand. Sprinkle chocolate chips in bottom of pie shell. Pour pecan mixture into pie shell and bake 40-45 minutes.

Suggested extras
¼ cup of cocoa
Top with whipped cream
Use pecans but add ¼ cup finely chopped cranberries, omit the chocolate chips
¾ cup of chocolate chips and ¼ cup of cocoa, no nuts, use light corn syrup

* Recipe courtesy of Chefs dot com with stated ingredient adjustments.


Baking tips from Aussie’s Kitchen

No oven is the same, they all heat differently and with wear and tear the changes continue. If your pie shell browns too quickly turn the heat down by 25 degrees for the remainder of the cooking time.

If you use a frozen shell in a pan thaw it but do not pre-bake it, it’ll burn before the pie is done. Sit on the counter to thaw. If you use rolled pre-made dough take it out of the fridge before you begin mixing. This will allow it to reach room temperature without disturbing the form. If the dough is too warm it’ll crack and or tear while trying to unroll it, for this reason you do not want to use a microwave to thaw it. Thawing pre-baked pastries is best accomplished by sitting it on the counter and allowing it to reach room temperature.

Homemade pastry shells are not as hard as they seem. To get a flaky crust use half butter and half margarine. Since the fat will begin to melt you’ll need to refrigerate the dough until you are ready to roll it out and place it in a pan. This technique will keep the fat cold so that you get the flaky crust you desire. Do not over knead the dough because it’ll make the crust hard and dry. It takes about 5 good kneading rolls to reach the desired consistency of your crust. If you need to add more water NEVER do so by holding the bowl under the faucet. Use a ¼ teaspoon measure to add a little water at a time. If you add too much then you end up adding more flour to compensate. Of course then you’ve added too much flour so now you have to add more water. The cycle is vicious and only results in a hard crust that nobody wants to eat. Always pre-measure ingredients and never add unmeasured water to your dish.

Thank you for visiting,
Aussie’s Kitchen

Cooking for one is worth it when that one person is you.

Sunday, February 12, 2006

Breakfast Ambiance


Breakfast Ambiance

MENU


  • Pancakes
  • Grilled Ham, sausage or bacon
  • Eggs over medium
  • Coffee
  • Warm syrup
  • Candles or Fresh Flowers
According to the Encarta English Dictionary Ambiance is defined as:
“The typical atmosphere or mood of a place.
A restaurant with a welcoming ambiance”
Synonyms for Ambiance: Atmosphere, Character, Quality, Vibes

In order to illustrate the meaning of ambiance the writers used the example:
• A restaurant with a welcoming ambiance”

The vast majority of the time the word ambiance is used in association with a place to have a nice meal. A place to have a meal comfort and ease OR of excitement, life and energy. This would also indicate that what we choose to eat is closely related to how we feel at the moment. You can create a welcoming, inviting ambiance in your home whether you are sharing a meal with your family, a partner or eating solo.

Tonight’s dinner was done in a hurry at a quarter past midnight. I could have inhaled it in front of late night television but I thought I'd take the opportunity to enjoy the meal. As you can see, it’s your regular Grand Slam breakfast at your local Denny’s Restaurant, usually costing around $6.00 without the tip. My late night “Denny’s” special included candles and a midnight sky line view, no tip required. It was simple, a tad bit romantic but most of all it was enjoyable.

Would pancakes taste different while laughing at Jay Leno? No, probably not but then, I’ll never know because I chose to seize the moment and enjoy a candle lit midnight breakfast.

Take every opportunity to make how you eat as enjoyable as what you eat.

Thank you for visiting
Aussie’s Kitchen


Cooking for one is worth it when that one person is you.
Rate this recipe by leaving a comment. All ratings are welcome!

Saturday, February 11, 2006

Lemon Pepper Chicken w/ Pasta

LEMON PEPPER CHICKEN
With Fettuccini Alfredo And Broccoli Florets
Serves one


Posted by Picasa INGREDIENTS


Chicken breast
Boiled pasta
Alfredo sauce
Broccoli florets
Lemon pepper seasoning


UTENSILS NEEDED

George Forman Grill
Microwave
Sandwich bags
Foil

COOKING INSTRUCTIONS:
Begin by boiling the pasta. While the pasta is on heat your George Forman grill with the lid closed.
Sprinkle lemon pepper seasoning on both sides of the chicken breast and wrap the chicken in the foil. **see wrapping instructions**. Place the foil wrapped chicken on the grill and cook until done. While the chicken is on the grill put desired amount of broccoli in a sandwich bag and microwave it until it’s done.

MAXIMUM COOKING AND PREP TIME:
30 min (this includes all steps of this recipe).


COOKING TIPS

Wrapped meats on the George Forman Grill

I'm sure this is a new concept for everyone because on a George Forman Grill you usually just put the meat right on the grill. When you cook outside on a grill don’t you sometimes wrap meat and potatoes when you could just put it straight on the grill? We do it for a few reasons, to keep the moisture in and to seal the flavor. The same principal applies on your Forman Grill.

In order to keep the moisture in and to release the flavor in the seasoning wrap the chicken so that the crease is facing up. Seal the ends of the foil by folding them up. Your foil should be folded 4 times to keep the flavor in and to maximize moisture. You can use this technique with shrimp and beef as well.


Suggestions:
Add salad shrimp on top of the fettuccini Alfredo with a bit of fresh pepper.
If you have chicken left over like I did, slice it in long strips and save it for a chicken wrap for tomorrows lunch.

The ambiance for tonight was a completely set dinner table with a winter backdrop. The curtains were fully open and I faced the golf course while the candles burned. At one point I got up and danced. The radio was on. It wasn’t a romantic dinner because the song “She Hates Me” by Puddle of Mudd was on. So, see, a candle light dinner with a bit of grunge is an acceptable ambiance.


Thank you for visiting
Aussie’s Kitchen

Cooking for one is worth it when that one person is you.

Rate this recipe by leaving a comment. All rating are welcome!

Wednesday, February 01, 2006

Cheddar Cheese & Garlic Biscuits


Cheddar Cheese & Garlic Biscuits

2 cups Original Bisquick (please see commentary)
2/3 cup milk
1/2 cup shredded Cheddar cheese (2 ounces)
2 tablespoons margarine or butter, melted
1/8 teaspoon garlic powder

Heat oven to 450 F.

Stir Bisquick, milk and cheese until soft dough forms. Drop dough by 9 spoonfuls onto ungreased cookie sheet.

Bake 8 to 10 minutes or until golden brown. Stir together margarine and garlic powder; brush over warm biscuits.

Makes 9 biscuits

COMMENTARY

Since this journal is about easy recipes I thought I'd put up the Bisquick version.
For those of us who refuse to use Bisquick, use your favorite biscuit recipe. You can find easy biscuit recipes on the back of your flour bag. Storage suggestions will be on the back of the flour bag as well.

Biscuit Do’s and Don’ts

Do: Use two different types of fats in your biscuits. Use half real butter and half margarine. This will give you a mild buttery taste like at your favorite restraint. Using two fats this way makes the flavor mild, not tasteless as with margarine or overly rich with just butter.

Do: Use the fat straight out of the refrigerator. When the fat is at room temperature it won’t make those fluffy layers we all love.

Don’t: Don’t over mix the dough because they’ll serve better for bricks than as a side for dinner. Mixing causes the gluten in flour to form. Under mixing makes it too hard, over mixing does the same thing. The time it takes to mix biscuits is about 5 min total. This time includes mixing and kneading.

Don’t: Don’t sweat this. They’re just biscuits. Biscuit making ranks pretty low on the grand scheme of things. If all else fails use tube biscuits and drape a piece of cheese over them during the last few minutes of baking.

YOU ARE WORTH IT

Do you scarf down lunch because it’s just lunch? Do you eat selection A3 from the machine daily because it’s just lunch? Not everyone feels every meal should be a celebration of flavor and atmosphere, but in my opinion, how we eat reflects how we feel about our inner self.
Are you worth setting the table during dinner? Does it seem silly to set it for lunch when you don’t even do it for dinner? Taking time for yourself and to give yourself your best is never silly. We put our best foot forward for everyone all the time. What’s wrong with putting your best foot forward for you? Pride is pride even when it’s felt standing alone in a kitchen. Pride is pride before a crowd or at a table alone. So when you do whatever you do, do your best. When you are amongst others, when you are alone, put your best foot forward. If others are worth the effort you certainly are worth even more.

As always, thank you for visiting
Aussie’s Kitchen

Cooking for one is worth it when that one person is you.
Comments are always welcome!

Monday, December 26, 2005

Chocolate Chip Cookie Ideas

Original Nestlé Toll House Chocolate Chip Cookies
Hershey’s Home Page


1/4 cups all-purpose flour
1 teaspoon baking soda
1 teaspoon salt
1 cup (2 sticks) butter, softened (we recommend LAND O LAKES® Butter)
3/4 cup granulated sugar
3/4 cup packed brown sugar
1 teaspoon vanilla extract
2 large eggs
2 cups (12-ounce package) NESTLE TOLL HOUSE® Semi-Sweet Chocolate Morsels
1 cup chopped nuts (optional)


PREHEAT oven to 375°F.
COMBINE flour, baking soda and salt in small bowl. Beat butter, granulated sugar, brown sugar and vanilla extract in large mixer bowl until creamy. Add eggs one at a time, beating well after each addition. Gradually beat in flour mixture. Stir in morsels and nuts. Drop by rounded tablespoon onto ungreased baking sheets.
BAKE for 9 to 11 minutes or until golden brown. Cool on baking sheets or wire racks for 2 minutes; remove to wire racks to cool completely.


Cookie Ideas

  • Use a small cast iron pan to bake a cookie in then add whipped cream and a cherry.
  • Use sundae cups and make a chocolate chip cookie sundae.
  • Bake the cookies in muffin tins with fun coloured muffin wrappers.
  • Bake them twice for a scone effect.
COOKING TIPS
If you over bake the cookies and they come out too crispy for your liking there is a something you can do to make them palatable. Let the cookies cool but not completely. When the cookies are just about to room temperature put them back in the oven at 300 degrees for no more than 5 min. This will bake them harder and have the effect and taste of a scone that you’d buy at coffee houses for $2.00 piece. Use them for guests with coffee or tea.

How to cream eggs, butter and sugar:
If you’re using a small mixer attach the paddle and turn the mixer speed to 5 for about 3 min. You will know when the eggs and butter are creamed when it has a smooth texture. If it’s not creamed well enough you’ll see large clumps of sugar through out the mix.

Tip from the recipe site Epicurious
Baking/Roasting
434. If while you're creaming butter it becomes runny rather than light and fluffy, shove the bowl in the refrigerator and chill it until firm. Then begin beating again.—Nancy Silverton, adapted from Desserts (HarperCollins)from 1,001 Secrets of Great Cooks, by Jean Anderson(The Berkley Publishing Group: 1995).

Egg Etiquette

It is not true that you should let your egg sit until it reaches room temperature. In general you want the ingredients to all be at the same temperature before combing them. If you let an egg sit out until it reaches room temperature you take the chance of spoiling it and causing an upset stomach. There is a food safety zone that says that all foods must be held below 45 degrees or above 145 degrees to not produce rapid growing bacteria. The lag time between low bacteria and dangerous bacterial growth is about an hour. This leaves no room for the old technique of letting eggs sit out for days at a time before baking a cake. While traditional cooking tastes better than modern recipes you must use modern safety to combat modern viruses and food born illnesses. Don’t trade one for the other, combine them both and prevent an upset stomach.

For a list of cooking terms see the following site:
The Cook's Thesaurus

The Cook's Thesaurus is a cooking encyclopedia that covers thousands of ingredients and kitchen tools. Entries include pictures, descriptions, synonyms, pronunciations, and suggested substitutions.
COMMENTARY
Take pleasure in what you eat even when you’re eating it alone. Use sundae cups for yourself. Bake the cookie in a small pan for yourself. The TV therapist Dr. Phil says in reference to dating, if you wouldn’t date someone like you why would you expect someone to date you? If you can’t enjoy your own company why would you expect others to enjoy it? Take the opportunity to lounge in your favorite chair and spoon out a gooey chocolate chip cookie sundae topped with whipped cream and a cherry. Enjoy yourself with others AND alone.

As always, thank you for visiting
Aussie’s Kitchen
Cooking for one is worth it when that one person is you.

Rate these cookie ideas by leaving a commentAll ratings are welcome!

EASY CHICKEN POT PIE


CHICKEN POT PIE
Chicken pot pie recipe serves 6.

MAXIMUM COOKING AND PREP TIME: FOR BOTH OVEN TEMPERATURE SETTINGS
1 hour 20 min (this includes all steps of this recipe).

INGREDIENTS
  • 3 cups cooked chicken, chopped
  • 2 purchased or homemade pie crust

  • 1 can of corn
  • 1 can of cut carrots
  • ½ can of peas
  • 1 can of potatoes cut into bite size pieces
  • 1 1/2 cups chicken broth
  • 1 tablespoon of corn starch
  • 1 egg, beaten
  • Optional:
    1 medium onion, chopped
  • 1/2 cup sliced celery
  • 1 teaspoon poultry seasoning

UTENSILS NEEDED
Large baking dish
Extra large mixing bowl
Small cup or bowl for the beaten egg

COOKING INSTRUCTIONS:
Open all caned veggies and place them in a very large mixing bowl.
Chop the chicken into bite size pieces and place them in the same bowl as the vegetables then mix so that the ingredients are distributed evenly. Set aside.

In a medium size sauce pan add the chicken broth. If you have chosen to also include poultry seasoning, please add it to this cooking step. Bring the broth to a boil and add the corn starch. ** see corn starch tips ** The sauce should thicken quickly so stay beside it. Stir continuously so as not to allow lumps to form. When the sauce has thickened set it aside and work on the pastry.

Beat one egg. Unroll two pastry shells. Brush the sides of your pan with part of the beaten egg. This will allow the shell to stick to the sides and not fall over on itself or move around. Add half the chicken and veggie mix to the pan then add half the sauce on top. Repeat this step with the remaining chicken and veggie mix. Unroll the second pastry and place it on top of the pie. Be sure to seal the edges either by pinching them or using a fork. Also remember to put a ventilation hole on the top crust. The recipe index that I use says to add the other half of the egg to the top pastry. This effect can be seen in the photo. I prefer my crust to not shine! If you prefer this effect then add the egg to your top crust, if not then omit the egg and learn from my mistake. Place in the preheated oven on 350 degrees for about 50 min or until the crust browns or Bake at 400° for 30 to 40 minutes, or until crust is browned.

Do not cut immediately after taking the pot pie from the oven. Allow it to cool at least 20 min then serve.

COOKING TIPS
Cornstarch
The best way to avoid those horrible lumps in sauces and soups is to put dissolve the corn starch in COLD water first. When you apply it the sauces should be very hot. Continue to stir the bottom of the pan so that lumps don’t form down there. Also, if you use cornstarch expect the corn starch taste. To combat the bland taste, add a little more butter. Use a roux to thicken soups and sauces so that the cornstarch taste isn’t a problem.

Using white flour to thicken will also cause lumps in your soups and sauces so you must treat it as cornstarch and dissolve it in COLD water first. Never add cornstarch or flour directly to the dish without dissolving it first. It will lump immediately and you’ll get those classic comments about lumpy sauce. Of course when the sauce doesn’t come out lumpy you’ll still hear about the sauces that lumped up. Either way, you’ll know if you’ve done it right if it comes out smooth or smoother than before. It’s not like they’re not going to eat it. Comment or no comment you know if they liked your lumpy sauce they’re going to scarf down the lump-free sauce.

Herbs, Spices and Marinating
When making white sauces or cream soups use white pepper. Use black pepper for brown sauces. When using white pepper use less than you would of the black because it is a lot stronger than the black pepper. I don’t remember why it’s hotter but it is. If you only have black pepper don’t worry about it, use it in your sauce. Add the pepper towards the end of the cooking time. If you add pepper in the beginning you’ll burn off all the oils that could have been saved by delaying their addition to your sauce.

When baking with herbs and spices the same principle applies. The heat is too strong for herbs and spices so the oils are burned and the flavor is decreased dramatically. Add the herbs and spices towards the end of the cooking time to preserve the flavor. I know many are use to adding the herbs on the top of meat and popping it in the oven with the firm belief that they’ll have time to really soak in the meat and make it flavorful. It won’t. Herbs and spices go only about 1 inch into the meat after several hours of marinating. Putting herbs and spices on top of meat and putting it in the oven will release some of the flavor but most of it will be burned off and dried up by the high heat. Covering the herb topped meat reduces the burning process but it does not prevent it. If you are short on time and can’t get back to the oven to put the herbs on the meat cover it with foil so that the herbs will not loose all their oils. You can always add more after you’ve taken the dish out of the oven.

Ladies and Gentlemen: thank you for visiting
Aussie’s Kitchen
Cooking for one is worth it when that one person is you.
Rate this recipe by leaving a commentAll rating are welcome!

Tuesday, November 15, 2005

Honey Mustard Chicken

Honey Mustard Chicken


INGREDIENTS

  • Chicken tenders
  • Cornbread Stuffing
  • Zucchini
  • Mustard Pepper Seasoning (Grill Creations)
  • Honey
  • 2 Tablespoons of margarine or butter
  • Whole cranberries

UTENSILS NEEDED

  • George Forman Grill
  • Pan for stuffing and zucchini

COOKING INSTRUCTIONS

Start the dressing first. Read the instructions on the back of the dressing box carefully and make the desired amount. Add cranberries to the dressing while it’s cooking.

Preheat the grill for two minutes
Place up to 3 chicken strips on the grill at one with the lid open
Place 1 tablespoon of butter on top of the strips and allow it to melt before putting the lid down
After about 30 seconds sprinkle the mustard seasoning on top of the chicken and close the lid. The chicken will cook quickly so watch it closely. (Chicken is done when the juices are clear.)
When the chicken is done, drizzle a tiny bit of honey over the top of it and allow it to cook for only 5 seconds more.
The entire process should take less than 5 min.
Repeat these steps for the remaining chicken strips.
Nuke a veggie and plate it up. Enjoy.

COMMENTARY
Meals that we enjoy do not have to be completely homemade. I use boxed items for convenience sake. It’s cheaper for me to make some items homemade but the energy it takes is sometimes lacking. Boxed items allow me to eat what I want to eat but save the energy for something else. That’s what this journal is about, eating well and saving energy. When you see convenience items in this journal don’t raise your eyebrows and say, “I thought she was a certified chef?” I am. I'm a certified chef struggling with depression. I’ve been through a lot of therapy and I’ve got a lot of good ideas about how to acclimate my life to this condition. This journal is about sharing those ideas, not about “gourmet” meals by Aussie.

COOKING TIPS
Herbs and Spices

Oh, those herbs and spices! We see chef’s use them all the time and wish we knew how to do it. Well, you can. If you don’t know what spice goes with what dish then check the back of the box of items that you like. The back of your dressing box will tell you what herbs are in it. These are the herbs that go best with chicken. If you look at the back of a box of tuna helper the spices in it are the spices that go best with fish. Don’t stop there though, when you’re in the store check out the ingredients of items you’d love to buy but cost too much. Notice the herbs and spices as well as the veggies in it and combine those ingredients at home. Your guide to balancing herbs and spices is this: ¼ the amount of spices as herbs. It’s really that simple. If you like spicy then add a little more spice, if you are more of a mild flavor person like myself then use a little less. In your kitchen you reign supreme. The rules can be bent in some cases (not with baking) so don’t worry about doing things exactly the way you’ve seen Martha Stewart do it on TV. If your family doesn’t like it then blame it on the black chick on the web!

When to Walk Away

Have you ever noticed that you add a little this or that to a dish but it just doesn’t taste right so you add a little more and a little more? I do that too but I have to decide when to let well enough alone. After a few samples of your dish it all tastes the same. More salt, more sugar, more this or that wont make much of a difference because what you’re dealing with is not a food issue, it’s a *mental picture you’re trying to change via your taste buds. It doesn’t work so walk away, work on another task and come back to the dish, taste it again and go from there. If you just can’t walk away try cleaning your palate. Take long, deep breaths in whole coffee beans.

*Mental picture: our personal expectations, our ideal dish or ideal baked goods. If you see yourself as Martha Stewart and you expect your dish to turn out like something she would make then you’re fooling yourself. Your mental image doesn’t jive with what is before you. Keep your expectations real and grounded. Know when to walk away and let well enough alone.

Thank you for visiting,
Aussie’s Kitchen

Cooking for one is worth it when that one person is you.
Rate this recipe by leaving a comment
All rating are welcome!

Sunday, November 13, 2005

Spicy Chicken and Lentils


Spicy chicken and lentils

INGREDIENTS

  • 1 chicken breast
  • ½ box of Chicken Thyme Soup
  • ¼ small red pepper
  • Green beans
  • Garlic bread
UTENSILS NEEDED

  • Slow cooker
  • George Forman Grill
  • Microwave-able dish for the green beans
COOKING INSTRUCTIONS

*Core the red pepper and discard the seeds. If you decide to add the seeds please be sure to have your family doctor on the phone so he can help your family administer hot pepper CPR. My suggestion is to get rid of the seeds. Slice the pepper in large strips and place them on top of the soup ingredients.

Read the instructions on the back of the box carefully. Remember to add only half the water because you’re only using half the ingredients. Place the contents of the soup in a slow cooker and set it on medium, put the peppers on top. The lentils will cook slowly and take up to 3 hours so this is one of those recipes you don’t have to stay home and watch over.

When the lentils are done put your chicken breast on the grill and allow it to cook. To get the grilled look pre-heat the grill for two minutes.
Toast bread or garlic bread.
Prepare a veggie
Enjoy
..
Commentary
In stores the soup mix will cost you up to $3.00 but I found this soup mix at my local food pantry. If you go to a food pantry and you are allowed to choose what you want be sure to look at everything. You may find little treasures such as this soup mix.

Beware of red peppers. If you use the seeds you will get burned. You must seed the pepper before adding it to the slow cooker soup.
COOKING TIPS
Food Safety Tips

Always wash your hands before and after cooking. The majority of food-born illnesses are a result of poor hand washing skills. So how do you wash your hands properly?
Position your hands under the water and scrub for about 5 seconds. Clean all the way past your wrist. When drying, hold your hands and arms facing down, not up. When the doctors on ER hold their arms up with the water dripping down it’s for Hollywood effect only. No doctor I’ve ever known or that I’ve seen would let the water run down the arm and accumulate on the sleeves. Hold your hands and arms down so that the water runs off. Dry your hands well.

It is important to be balanced in your cleaning of food and food surfaces. If you spray enough you can keep down germs, if you spray too much the chemicals build up in your house and cause pulmonary difficulties for you, your family and your pets. Be balanced in how you clean and how you view germs. Be aware of what causes germs, like under-cleaned sponges and under-cleaned dish rags, cutting boards used without proper washing or surfaces holding raw meat and veggies simultaneously. The good thing about germs is, the body is designed to fight them and win. The bad thing about germs is, if we don’t understand them we can’t help our body fight them. Be balanced in your hand washing and be conscious of your food surfaces and as always, enjoy yourself.

Thank you for visiting,

Aussie’s Kitchen
Cooking for one is worth it when that one person is you.

Rate this recipe by leaving a comment
All rating are welcome!

Sunday, October 30, 2005

SLOW COOKER POT ROAST


SLOW COOKER POT ROAST

Winter is coming in fast and the days left to plant next season’s mums are few. As the cold air comes in we start dreading the snow that will soon cover our lawns and make travel difficult. In the midst of our complaints we may overlook the beauty of a virgin snow outside the door. When that moment comes when we appreciate that new snow we will want to celebrate it with a warm meal. Set your TV dinner table up near a window where you can see the bed of snow. Use that serenity as ambiance for pot roast from your slow cooker.

INGREDIENTS

  • 1 small beef or pork roast

  • 1 small diced onion

  • 1 can of Campbell’s tomato soup

  • 1 can of carrots

  • 1 can of potatoes

  • 1 can of cut green beans

  • 5 Pepper corns

  • 2 small sections from a garlic clove

UTENSILS NEEDED

  • Small slow cooker with low and high setting

  • Can opener

  • Spoon for stirring


COOKING INSTRUCTIONS:

Wash the roast and place it inside the slow cooker
Dice the onion and garlic and place on top of the roast
Fill the slow cooker bowl with water to ¾ full
Allow the roast to cook for about 1 hour and 40 minutes. *** see time***
After that time has estimated time has elapsed add all the canned veggies and condensed tomato soup. Stir well.
You may need to add more water to the slow cooker bowl at this time.
Allow the pot roast to finish cooking for about twenty minutes more.
When done serve as desired.

ESTIMATED COOKING TIME:

If you use a small roast of about 2 ½ - 3 pounds the entire process should only take 2 hours. This is not a meal you want to go off and leave while you run errands because when you come back it’ll be dry and ruined.

COOKING TIPS

I purchase frozen and diced onions from Wal-Mart and Krogers. I buy pre-diced bell pepper and celery this way also.

Veggies & Your Slow Cooker:
When adding canned veggies to a slow cooker you must consider that the veggies are already cooked. The longer you leave them in the mushy they’ll get. Nobody likes mushy veggies so put them in at the end of the estimated cooking time.

When using fresh garlic and whole pepper corns place them on top of the roast. This allows the roast to let off its juices and gather the spices before those juices roll off to collect as gravy. You get better tasting gravy this way. If your pepper corns and garlic sit at the bottom of the pot they do not release the flavor evenly the way they do when their flavor is allowed to release and flow in different directions.

Cutting Board Etiquette:
When dicing veggies you can use either a wooden or plastic cutting board. There has been a lot of controversy over which is more sanitary to use. One constant is that you never use the same board to cut meat and veggies. When you change boards to cut veggies it does no good if you don’t change the knife too. If you only have one board make sure you wash it well between each use. Washing your hands and cleaning your cutting boards with bleach is your best defense against many food born illnesses.

Cutting board myths and facts:

Myth: A dull knife won’t hurt you as much as a sharp knife will.
Fact: You cut yourself few times with a very sharp knife.
Reason: When the knife is too dull we exert more pressure. We often misjudge our strength and the knife slips and cuts a finger. When we force a dull knife to cut a dense object we leave far too much room for human error. This one error can cost us a nice size gash on our finger. Always use a nice sharp knife.
To minimize board slippage put a slightly damp dish towel under it. The towel will keep the traction as you move about the board.

After reading the do’s and don’ts try not to think of cooking as a huge task. Think of it as having more knowledge that will lead to a greater cooking experience. These food safety tips will let you keep your fingers; minimize stomach upset while building on the one thing that makes the biggest difference, your self confidence.


Cooking for one is worth it when that one person is you.

Thank you for visiting
Aussie’s Kitchen

Tuesday, October 11, 2005

Beef Patty Melt - Steak & Shake Style


Beef Patty Melt
Steak & Shake Style


When there’s little money for necessities there’s even less for luxury but the desire to eat good remains the same. I wanted a Steak & Shake Beef Patty Melt on rye bread but I didn’t have the money to waste. I decided to throw one together at home.

This recipe is simple. Grill a hamburger; toast rye bread, add white American cheese, grilled onions and Thousand Island Salad Dressing. Beside it lay some home fries then count the money you’ve saved.

Enjoy!

Ambiance tips:

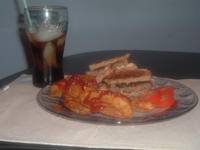
Ambiance can include the dishes you use. Instead of a regular cup I decided to have my cola in a Coke glass with a straw. That was really fun. I ate at my kitchen table but the meal was as enjoyable as if I’d gone out and paid someone else to cook for me.

There is something very satisfying about providing for your own needs. Self-sufficiency comes in many forms. Being able to myself a good meal instead of being forced to eat out is a cherished gift. I can spoil myself and I can take pride in that I know how to spoil myself. When I cook I cook for me. I even imagine standing in a high profile restaurant with a big white chef’s hat on flipping a pan of mushrooms or tossing a salad that accompanies an over priced meal. When I sit down to eat I’m eating the food created by the big-time Chef I just pretended to be. This is a clear indication of either severe mental illness or the ability to create ambiance in my mind. Either way I enjoyed the meal and the perceived ambiance. I hope you enjoy your meal too.

Thank you for visiting
Aussie’s Kitchen


Thursday, September 29, 2005

Beef and Broccoli China Style


Beef and Broccoli China Style


INGREDIENTS


  • 2 thin sliced beef cuts

  • 1 bag of microwave-able rice

  • 1 cup of broccoli spears

  • ¼ cup of pre-chopped 3 pepper mix

  • 2 Tablespoons of chicken broth or regular cooking oil

  • 2 Tablespoons of soy sauce

  • ½ Tablespoon of chopped garlic

  • Fresh pepper


UTENSILS NEEDED

Small frying pan
Spatula
Microwave-able dish for the rice


Prep:
Get out all your ingredients and have them where you can reach them easily.
Cut the beef into small strips and set them aside.


COOKING INSTRUCTIONS
Measure broth, soy sauce, garlic and peppers and place them in the small frying pan with the broth. Let them simmer until the peppers are nearly done then add the sliced beef.
Boil or microwave the bag of rice. When it is done put it on a plate and set it aside.
Microwave the frozen broccoli florettes and place them on top of the cooked rice.
Add the pepper and beef mixture on top of the broccoli.
Add soy sauce to taste.
You’re ready to eat.

Commentary

This meal was a culmination of odds and ends that managed to tie me over until payday. With a little imagination and a bit of know how, it became a dish that I am sure to make again.

COOKING TIPS

The layering technique

The ingredients with the most moisture should go on top so that the sauces trickle down to the less moist ingredients. With this recipe your layers should go as follows:

Top
Soy sauce
Beef and pepper mixture
Broccoli
Rice
Bottom


SHOPPING TIPS

I like to take advantage of the 10 for $10 sale at Kroger’s and other food chains that have this special. Buying bacon or sausage rolls full price is not within my budget. I can swing $1. Until October 5th the 10 for $10 sale includes items such as: canned salmon, chunk salmon canned in water, smoked or polish sausage, fabric softeners, Dole salad mix, mini peeled carrots and a bunch of other things. I don’t know about you but I’ll be at Kroger before the 5th to take advantage of these sales.

Aussie’s Kitchen


Cooking for one is worth it when that one person is you.

Rate this recipe by leaving a comment


Wednesday, September 28, 2005

Chocolate Chip Cookie Ideas


Chocolate Chip Cookies
COMING SOON
I really will get around to posting this.

Tuesday, September 20, 2005

GRILLED CHEESE IN A COOKBOOK JOURNAL?

The Perfect Grilled Cheese At Home
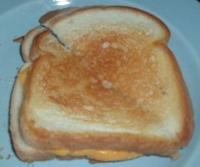

Am I really talking about a grilled cheese sandwich in my cookbook journal?
Yup, you got that right. This cookbook is about convenience not gourmet dishes. Unexpected events changed my plans and took up a lot of my day. I still needed to eat so I made a grilled cheese sandwich and had some tomato soup. It was hot and ended up being a pretty good supper. As I was cooking I got to thinking, when I’ve seen others make a grilled cheese it’s flat and greasy. Restaurant grilled cheese sandwiches are crisp and the cheese is melted perfectly. You can get that effect at home with a few simple tips.

The first thing you need to know is to get all your ingredients out at the same time. Don’t try to make the sandwich at the same time you’re heating the pan, cutting the butter and pulling the cheese out of the fridge. Prepping before you begin cooking not only saves time but also cuts down on the amount of food you burn.

Anyone can cook. If you can tie your shoes you can cook. If you can write a sentence, you can cook. You’re probably thinking, but this woman doesn’t know me. No, I don’t, but I know that the main thing standing in the way of completing a task successfully is the lack of self-confidence. If you are intimidated by the task your chances of failing and being devastated by that failure are higher than if you walked in the kitchen thinking, “I can do this.” Is this lying to yourself? No, it’s psyching yourself up to complete a task successfully. It’s not letting that little voice in your head remind you of the fire you set the last time you boiled water. If you have fire insurance then proceed with the task, if you don’t or you’re behind on your premiums please remember that Denny’s is open 24 hours a day. Sometimes the little voice in your head is actually standing beside you and goes by the name, “Dear Husband.” Please do not beat him with the spatula, just brush him aside and go about making your dish. Preparing food is not rocket science. It’s an art form. It’s putting common sense, observation and good judgment together and coming up with a meal you can be proud of.

Now, onto the cheese sandwich:

In the restaurant, have you noticed that on the grill the sandwich is NOT swimming in butter? No, it’s not. There’s butter on the bread but not a lot is on the grill. That’s how they keep from making the sandwich overly greasy. The grills have a constant temperature. They don’t increase or decrease they’re pre-set. Your home oven and stovetop are not pre-set and are not evenly tempered. Your pans are not of the same thickness or made of the same material. So taking a restaurant idea home with you has to have some adjustments.


  • Don’t pre-heat the pan. It’ll get too hot too quickly and you wont be able to put the butter on evenly.

  • Prep first. Get out all your ingredients, unwrap the cheese, cut the butter, get out your plate, the utensils, the napkins, a fork, etc.

  • Use a non-stick pan.

  • Adjust your heat up and down while the sandwich is grilling. This will insure that it doesn’t cook too fast and burn the bread while leaving the cheese raw. Adjusting your heat is what will keep you from burning your food.

  • Don’t rush it and don’t squash it. The heat will do its thing without you having to squash it to a golden flat grilled cheese pancake.

Put the first bit of butter in the pan and let it melt. Put the first slice of bread on top of the melted butter and then take it out of the pan. Repeat this step for the other slice of bread. Put the first slice back in with 2 slices of cheese on top. Allow it to cook on one side for about 2 min and then turn it. Let that side cook for about 2 min and turn it. Keep doing the 2 min cycles until the sandwich is golden and the cheese is melted.

Breaking Away From Old Rules

If you take your mind off the old idea that you turn the sandwich once or twice and you leave the heat on one setting then you’re prepping yourself to fail. The oven, the pans, the electricity or the gas are all working on different levels. If you put a blanket rule to objects that go by their own rules then you have chaos. You have to adjust accordingly. This is where the your good judgment and the confidence to use it comes in. You know how you like your sandwiches. I like mine crisp on the edges and golden on top with the cheese that strings when you pull it apart. You can get that effect if you remember that the old rules don’t always work. When you see it getting too brown and the other side is almost raw, turn the heat down. If your cheese is melting too fast but your bread isn’t quite done yet then adjust your heat down. Use your good judgment.

Turning your sandwich twenty times is not against the law. It’s not breaking any rules it’s not less professional than only turning it twice. It’s your kitchen, your meal and your time. If you end up turning your sandwich 20 times and it turns out to be the best grilled sandwich you’ve ever made then so be it, you turned it 20 times. If it ends up being so-so then you know what? The kitchen is still standing and no harm is done. What if it’s nasty? Don’t sweat it. It’s a sandwich. On the grand scheme of things, this is nothing. Just don’t quit trying. Anyone can cook. Even you! What’s my motto? Cooking for one is worth it when that one person is you.


Thank you for visiting Aussie’s Kitchen
It’s been a pleasure, come back and see me again.

Ginger Ale with Rasp & Frosty Ginger Apple Tea


Ginger Ale with Raspberries and Apple Slice Garnish

INGREDIENTS

Ginger Ale
¼ cup Raspberries
2 tablespoons of sugar

Stir the sugar in the ale and then add the berries. I started off with frozen raspberries previously picked from the garden. In order to release the juices I nuked them for 10 seconds and put them directly into the ale. Let it sit for about 2 min, give it a gentle stir and enjoy.


Substitutions:
Replacing the ice with frozen strawberries or frozen peaches.
Use 7UP or Sprite with berries

Not suggested for Ale:
Pineapple, mango, kiwi and citrus fruits will not work well with the ginger. They will work fine with 7UP and Sprite.


FROSTY GINGER APPLE TEA


This particular day I found myself with no pop, no kool-aid nothing! I had a few tea bags and some ice. I’d been drinking Luzianne tea for so long that I couldn’t stand the thought of another dull glass. I wanted something cold immediately and didn’t want to wait so I put some ice in a blender, nuked some water to dip the tea bag in, added sugar and voila, I had Frosty Ginger Apple Tea. Here’s how I did it.


1 bag of Ginger Apple Tea
1 cup of boiled water
3 cups of cubed ice
¼ cup of sugar
2 cups of cold water

Instructions

Nuke the water with the tea bag in it until it’s nice and hot. Take it out and let it sit as you work with the ice in the blender. Put the ice, 2 cups of water and sugar in the blender. Blend to the consistency of a thick slushy then add the full cup of tea, blend until smooth. Depending on the strength of your blender, you may need to stop and stir to make sure it gets to a smooth consistency. **see safety instructions** Adjust the sugar according to taste.

Substitutions:
Orange spice tea
Berry teas
Peach tea
Most flavored teas

Not suggested:
Green tea or teas containing green tea
Chamomile or Valerian root


Using a clear glass to drink from will allow you to enjoy the colours while you’re enjoying the flavor. I’ve spoken about how important ambience is. I was riding in a car at night with a friend who was eating a McDonald’s hamburger. She was driving with the inside lights on while eating this regular fast food hamburger. When I asked why she said she needs to see her food to maximize the enjoyment. If someone can maximize enjoyment by seeing an everyday hamburger then think of what true ambience can do for your meal. So whether you grill a burger or make a chicken sandwich, make the moment count. Take into consideration that food is more than something that keeps us alive; it can also nourish the mind and the spirit. Ambience can supplement that nourishment.

**BLENDER SAFETY**

STOP YOUR BLENDER BEFORE YOU STIR. Don’t stir while the blades are moving. This is very dangerous. Don’t lose a finger over some frosty tea. What would you do with the chopped finger? You see what happened to the lady from the Wendy’s scandal. She’s going to prison. Stop your blender before stirring. You can add ice and water while the blades are still moving but once you take the lid off or put in a spoon it is the safe and responsible thing to turn it off first.

There is a recent commercial out for Tylenol where the lady says, she’d rather you not use Tylenol at all if you’re not going to follow the safety instructions. I agree. If you’re going to risk limbs to make some tea, I’d prefer you open a can of pop.


Sunday, September 18, 2005

Cranberry Orange Muffins


Cranberry Orange Muffins


This muffin is a delight with breakfast or brunch, with fruit, fruit juice, tea or coffee. It’s easy to make because all the ingredients for the muffin itself are in your favorite Bisquic or Jiffy pancake mix.

Lets get started
Review the instructions on the side of your muffin mix box. Follow the instructions for making them with one exception. Decrease the amount of water by ¼ cup to compensate for the orange juice. After making basic muffins with your preferred pancake mix, fold in ¼ cup of dried cranberries and ¼ cup of orange juice. Now make your crumb topping.

Crumb topping ingredients:

You need 1/3 cup of regular flour
2 tablespoons of cold butter
1 teaspoon of cinnamon
¼ teaspoon of vanilla
1/3 cup of chopped pecans or walnuts

Instructions:

Put all ingredients in a small bowl and mix them together with a fork. Mix all ingredients until the consistence is that of crumbs. Put the topping on the muffins just before they go in the oven.

For best results let the muffins sit in the pan with the topping on for 3 minutes before putting them in the oven. This will give you a higher rise and a lighter muffin. If you forgot to preheat the oven, now is a good time to do it.


Substitutions:
This muffin recipe works well with blueberries, dried apples, dried apricots and other similar dried fruits, but do not add the orange juice to these variations. That’s just nasty. You wont’ like it so don’t do it.

Aussie’s Kitchen


Cooking for one is worth it when that one person is you.
Rate this recipe by leaving a comment

Monday, September 12, 2005

Spinach Summer Sandwich


This is one of my favorite sandwiches. I’ve been saying for weeks that I was going to make this sandwich. I picked up ingredients but never got around to making it. I went ahead, made the potato dill bread, and then put the sandwich together for dinner. I use to pay $5 for this sandwich at a local restaurant. The sandwich is good so I was willing to pay it. I didn’t have this kind of bread or cheese with it. I had some sort of whole grain bread and I bought the dilled cheese from a market across the street. By the time I got finished paying for the sandwich I shelled out five bucks. Man, it was worth it. I love this stuff!


Ingredients
Avocado
Cucumber
Tomato
Alfalfa sprouts
Mozzarella cheese slice
Fresh spinach leaves
Sweet red onion
Miracle Whip
Two slices of potato dill bread

Sunday, September 11, 2005

Grilled Pork Chop w/ Beans&Rice, Okra&Squash Mix


Grilled Pork Chop with Beans & Rice, Okra & Squash Mix

Before we begin, let me state that this meal was made without the use of the oven OR the stovetop. I got a little cocky as I wrote that sentence. I pride myself on good meals made with simplicity.

Your menu:
Boneless pork chop
** Frozen veggie: Cracked Pepper Seasoned Okra&Squash w/ tomatoes and onions
White rice
White beans

Other Ingredients:
1 cap: Olive oil
Garlic (fresh or powder)
Stock: 1 can of Campbell’s Chicken stock

Dishes you will need you will need:
Microwave oven
George Forman Grill
Microwave-able dishes
Basic spoon and fork

First Stage of Prep:
Open your can of beans and set asideDrain the stock from a can of Campbell’s Chicken soup and set the stock asideOpen your pre-cooked rice bag and place desired portion in a bowl, set asidePre-heat the grill for one minute set it asideWash your chop then pat it dry with a napkin, set it aside

Now you’re ready to cook:

Add ½ a cap olive oil directly to the preheated grill. Working quickly, add you’re a few shakes of garlic to the grillPlace the chop on the grill then add the other ½ cap of olive oil and a few more shakes of garlic to the top of the chop. Close the lid and allow the chop to cook. The chop I used was ½ inch thick and took about 3 min to grill. While the chop is grilling, put your desired portion of veggie mix, and desired portion of pre-cooked rice in separate microwave-able bowls and set the nuker for 3 min. By this time your chop should be done. Take it out and place plastic wrap over the plate to keep it warm, then set it aside. While the veggies and rice are cooking mix your beans with ¼ of the drained stock. When the first two items are done pop the beans and stock in the microwave for 2 min. To keep your veggies and rice warm, place a towel over the bowls. Once the beans are out you can plate it up the way you see in the photo and eat. If you want a sauce on your chop take some of the juice from the veggies along with a few of the tomatoes that are in the veggie mix. Smash the tomatoes, add a tiny bit of stock, stir it, nuke it, and put it over your chop.
** The frozen veggies used in this recipe came from Wal-Mart. The package will say: Cracked Pepper Seasoned Okra & Squash with Tomatoes and Onions. It’s a Pictsweet product in a bag.

Shopping tips:
Purchase your meats after 6pm on weekdays. After 6pm the butcher at your local store will begin marking the meat down. You can get great cuts at a fraction of the price. I purchased 3 Salmon steaks for $2.14 and a $12.00 beef shoulder roast for a little over $3.00.

When you are at the store be aware of your surroundings. You will notice discounted items as well as see new foods that you didn’t know they had. Choose your store carefully. Stores where everything is $1 can be helpful when purchasing fresh fruits, packs of pre-cooked rice, special coffees and sauces that would otherwise cost you a fortune in the regular stores. All for One Dollar stores are falling in line with big stores and accepting food stamp cards now. So check to see if your local All for One store accepts them.

I buy my frozen veggies from Wal-mart and Kroger stores. I usually pay less than a dollar for them. When the stores have the 10 items for $1 each pick up frozen chopped onions, frozen seasoned veggies and frozen bell peppers. All the chopping is done for you and many times the seasonings are already in with the veggies. It’s a sure thing, especially when you want a good meal with very little energy exerted.


Cooking for one is worth it when that one person is
YOU.

Thursday, September 08, 2005

Grilled Chops, Fried Apples, Plantain, Broccoli, Carrots


Grilled Pork Chop, Fried Apples & Plantain, Broccoli, Carrots
A 30-min oven-less meal
I do use the stovetop though.

Your menu:
Boneless pork chop
Fresh Apple
Plantain
Blackberries
Broccoli – Cauliflower mix
Carrots


Other Ingredients:
Sugar
Cinnamon
Butter
½ cup Oil
TBS Lemon juice

Dishes and utensils used:
Stovetop
Microwave oven
George Forman Grill

Instructions:
Please read all instructions before you begin cooking

First Stage of Prep:
Put carrots and veggie mix beside each other in a microwave-able dish, set aside
Cut the apple in rings (with or without the peel), put them in a bit of lemon juice, set aside
Cut Plantain in ¼ inch slices in the desired amount, set aside.
Note: Do not add lemon juice.
Heat oil in a small frying pan
Wash your chop then pat it dry with a napkin, set it aside
Pre-heat the grill for one minute set it aside

Now you’re ready to cook:

Place the chop on the grill and allow the chop to cook. The chop I used was ½ inch thick and took about 2 min to grill. When it’s done place it on a plate and cover the plate to keep it warm. While the chop is grilling, put your veggies in the nuker for 3 min.
By this time your oil should be nice and ready for frying. Fry your apples first.


Fried Apples:
Put apple slices in the frying pan and let fry on each side for 1½ minutes.
After they are done put them on a napkin to drain.

Fried Plantain:
Put plantain slices in frying pan and let each side fry until they are golden. This will happen quickly. Do not over fry. Tough plantain is nasty. You want them soft, not firm.
After removing them from the pan pat them with a napkin then immediately sprinkle them with sugar and cinnamon.

Plate it all up as seen in the photo or arrange as desired. If you want sauce for your chop, mash a fried apple slice; add a little butter and water then nuke it for one minute. Stir until smooth and pour it over your chop.


Shopping tips:
Purchase your meats after 6pm on weekdays. After 6pm the butcher at your local store will begin marking the meat down. You can get great cuts at a fraction of the price.
When you are at the store be aware of your surroundings. You will notice discounted items as well as new foods that you didn’t know they had.

Grilling tips:
Leaving your chop on the grill too long will dry it out. If you want a juicy chop prop up the draining end of your grill while keeping your draining tray in place. This will allow the chop to retain more of the juices.

Suggested Ambiance
I just set the table with the tablecloth turned over to hide the pattern. It turned out to be a lot more attractive than I thought it would. Had it been tacky I would have turned it back over and not thought about it again. Trying new ideas can be done with confidence. When it doesn’t look right you try something new.
*****

Cooking for one is worth it when that one person is you.
Enjoy