Monday, December 26, 2005

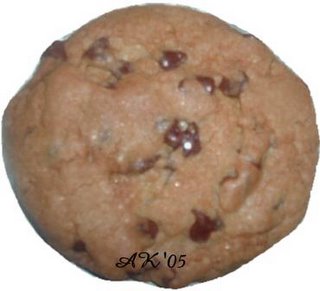
Chocolate Chip Cookie Ideas

Original Nestlé Toll House Chocolate Chip Cookies
Hershey’s Home Page


1/4 cups all-purpose flour
1 teaspoon baking soda
1 teaspoon salt
1 cup (2 sticks) butter, softened (we recommend LAND O LAKES® Butter)
3/4 cup granulated sugar
3/4 cup packed brown sugar
1 teaspoon vanilla extract
2 large eggs
2 cups (12-ounce package) NESTLE TOLL HOUSE® Semi-Sweet Chocolate Morsels
1 cup chopped nuts (optional)


PREHEAT oven to 375°F.
COMBINE flour, baking soda and salt in small bowl. Beat butter, granulated sugar, brown sugar and vanilla extract in large mixer bowl until creamy. Add eggs one at a time, beating well after each addition. Gradually beat in flour mixture. Stir in morsels and nuts. Drop by rounded tablespoon onto ungreased baking sheets.
BAKE for 9 to 11 minutes or until golden brown. Cool on baking sheets or wire racks for 2 minutes; remove to wire racks to cool completely.


Cookie Ideas

  • Use a small cast iron pan to bake a cookie in then add whipped cream and a cherry.
  • Use sundae cups and make a chocolate chip cookie sundae.
  • Bake the cookies in muffin tins with fun coloured muffin wrappers.
  • Bake them twice for a scone effect.
COOKING TIPS
If you over bake the cookies and they come out too crispy for your liking there is a something you can do to make them palatable. Let the cookies cool but not completely. When the cookies are just about to room temperature put them back in the oven at 300 degrees for no more than 5 min. This will bake them harder and have the effect and taste of a scone that you’d buy at coffee houses for $2.00 piece. Use them for guests with coffee or tea.

How to cream eggs, butter and sugar:
If you’re using a small mixer attach the paddle and turn the mixer speed to 5 for about 3 min. You will know when the eggs and butter are creamed when it has a smooth texture. If it’s not creamed well enough you’ll see large clumps of sugar through out the mix.

Tip from the recipe site Epicurious
Baking/Roasting
434. If while you're creaming butter it becomes runny rather than light and fluffy, shove the bowl in the refrigerator and chill it until firm. Then begin beating again.—Nancy Silverton, adapted from Desserts (HarperCollins)from 1,001 Secrets of Great Cooks, by Jean Anderson(The Berkley Publishing Group: 1995).

Egg Etiquette

It is not true that you should let your egg sit until it reaches room temperature. In general you want the ingredients to all be at the same temperature before combing them. If you let an egg sit out until it reaches room temperature you take the chance of spoiling it and causing an upset stomach. There is a food safety zone that says that all foods must be held below 45 degrees or above 145 degrees to not produce rapid growing bacteria. The lag time between low bacteria and dangerous bacterial growth is about an hour. This leaves no room for the old technique of letting eggs sit out for days at a time before baking a cake. While traditional cooking tastes better than modern recipes you must use modern safety to combat modern viruses and food born illnesses. Don’t trade one for the other, combine them both and prevent an upset stomach.

For a list of cooking terms see the following site:
The Cook's Thesaurus

The Cook's Thesaurus is a cooking encyclopedia that covers thousands of ingredients and kitchen tools. Entries include pictures, descriptions, synonyms, pronunciations, and suggested substitutions.
COMMENTARY
Take pleasure in what you eat even when you’re eating it alone. Use sundae cups for yourself. Bake the cookie in a small pan for yourself. The TV therapist Dr. Phil says in reference to dating, if you wouldn’t date someone like you why would you expect someone to date you? If you can’t enjoy your own company why would you expect others to enjoy it? Take the opportunity to lounge in your favorite chair and spoon out a gooey chocolate chip cookie sundae topped with whipped cream and a cherry. Enjoy yourself with others AND alone.

As always, thank you for visiting
Aussie’s Kitchen
Cooking for one is worth it when that one person is you.

Rate these cookie ideas by leaving a commentAll ratings are welcome!

EASY CHICKEN POT PIE


CHICKEN POT PIE
Chicken pot pie recipe serves 6.

MAXIMUM COOKING AND PREP TIME: FOR BOTH OVEN TEMPERATURE SETTINGS
1 hour 20 min (this includes all steps of this recipe).

INGREDIENTS
  • 3 cups cooked chicken, chopped
  • 2 purchased or homemade pie crust

  • 1 can of corn
  • 1 can of cut carrots
  • ½ can of peas
  • 1 can of potatoes cut into bite size pieces
  • 1 1/2 cups chicken broth
  • 1 tablespoon of corn starch
  • 1 egg, beaten
  • Optional:
    1 medium onion, chopped
  • 1/2 cup sliced celery
  • 1 teaspoon poultry seasoning

UTENSILS NEEDED
Large baking dish
Extra large mixing bowl
Small cup or bowl for the beaten egg

COOKING INSTRUCTIONS:
Open all caned veggies and place them in a very large mixing bowl.
Chop the chicken into bite size pieces and place them in the same bowl as the vegetables then mix so that the ingredients are distributed evenly. Set aside.

In a medium size sauce pan add the chicken broth. If you have chosen to also include poultry seasoning, please add it to this cooking step. Bring the broth to a boil and add the corn starch. ** see corn starch tips ** The sauce should thicken quickly so stay beside it. Stir continuously so as not to allow lumps to form. When the sauce has thickened set it aside and work on the pastry.

Beat one egg. Unroll two pastry shells. Brush the sides of your pan with part of the beaten egg. This will allow the shell to stick to the sides and not fall over on itself or move around. Add half the chicken and veggie mix to the pan then add half the sauce on top. Repeat this step with the remaining chicken and veggie mix. Unroll the second pastry and place it on top of the pie. Be sure to seal the edges either by pinching them or using a fork. Also remember to put a ventilation hole on the top crust. The recipe index that I use says to add the other half of the egg to the top pastry. This effect can be seen in the photo. I prefer my crust to not shine! If you prefer this effect then add the egg to your top crust, if not then omit the egg and learn from my mistake. Place in the preheated oven on 350 degrees for about 50 min or until the crust browns or Bake at 400° for 30 to 40 minutes, or until crust is browned.

Do not cut immediately after taking the pot pie from the oven. Allow it to cool at least 20 min then serve.

COOKING TIPS
Cornstarch
The best way to avoid those horrible lumps in sauces and soups is to put dissolve the corn starch in COLD water first. When you apply it the sauces should be very hot. Continue to stir the bottom of the pan so that lumps don’t form down there. Also, if you use cornstarch expect the corn starch taste. To combat the bland taste, add a little more butter. Use a roux to thicken soups and sauces so that the cornstarch taste isn’t a problem.

Using white flour to thicken will also cause lumps in your soups and sauces so you must treat it as cornstarch and dissolve it in COLD water first. Never add cornstarch or flour directly to the dish without dissolving it first. It will lump immediately and you’ll get those classic comments about lumpy sauce. Of course when the sauce doesn’t come out lumpy you’ll still hear about the sauces that lumped up. Either way, you’ll know if you’ve done it right if it comes out smooth or smoother than before. It’s not like they’re not going to eat it. Comment or no comment you know if they liked your lumpy sauce they’re going to scarf down the lump-free sauce.

Herbs, Spices and Marinating
When making white sauces or cream soups use white pepper. Use black pepper for brown sauces. When using white pepper use less than you would of the black because it is a lot stronger than the black pepper. I don’t remember why it’s hotter but it is. If you only have black pepper don’t worry about it, use it in your sauce. Add the pepper towards the end of the cooking time. If you add pepper in the beginning you’ll burn off all the oils that could have been saved by delaying their addition to your sauce.

When baking with herbs and spices the same principle applies. The heat is too strong for herbs and spices so the oils are burned and the flavor is decreased dramatically. Add the herbs and spices towards the end of the cooking time to preserve the flavor. I know many are use to adding the herbs on the top of meat and popping it in the oven with the firm belief that they’ll have time to really soak in the meat and make it flavorful. It won’t. Herbs and spices go only about 1 inch into the meat after several hours of marinating. Putting herbs and spices on top of meat and putting it in the oven will release some of the flavor but most of it will be burned off and dried up by the high heat. Covering the herb topped meat reduces the burning process but it does not prevent it. If you are short on time and can’t get back to the oven to put the herbs on the meat cover it with foil so that the herbs will not loose all their oils. You can always add more after you’ve taken the dish out of the oven.

Ladies and Gentlemen: thank you for visiting
Aussie’s Kitchen
Cooking for one is worth it when that one person is you.
Rate this recipe by leaving a commentAll rating are welcome!